Installing a faucet can seem intimidating, especially for those who haven’t tackled plumbing projects before.
However, with the right tools and a bit of guidance, even beginners can successfully replace or install a new faucet.
This article will walk you through the essential steps involved in faucet installation, breaking down the process into manageable sections.
Gathering Necessary Tools and Materials
Before starting the installation, ensure you have all the required tools and materials. For this task, you’ll need:
A new faucet
Adjustable wrench
Basin wrench
Plumber’s tape
Screwdriver set
Bucket or towel
Pliers
Having everything ready before you begin can save frustration later. Think about it: nothing slows down a project like a mid-installation run to the hardware store.
Turning Off the Water Supply
Safety first! Always turn off the water supply before beginning any plumbing work. Locate the shut-off valves under the sink.
Turn them clockwise to stop the water flow. If your sink doesn’t have shut-off valves, you may need to turn off the main water supply to your home.
It’s a good idea to open the faucet after shutting off the water. This allows any remaining water in the lines to drain out, preventing spills.
Removing the Old Faucet
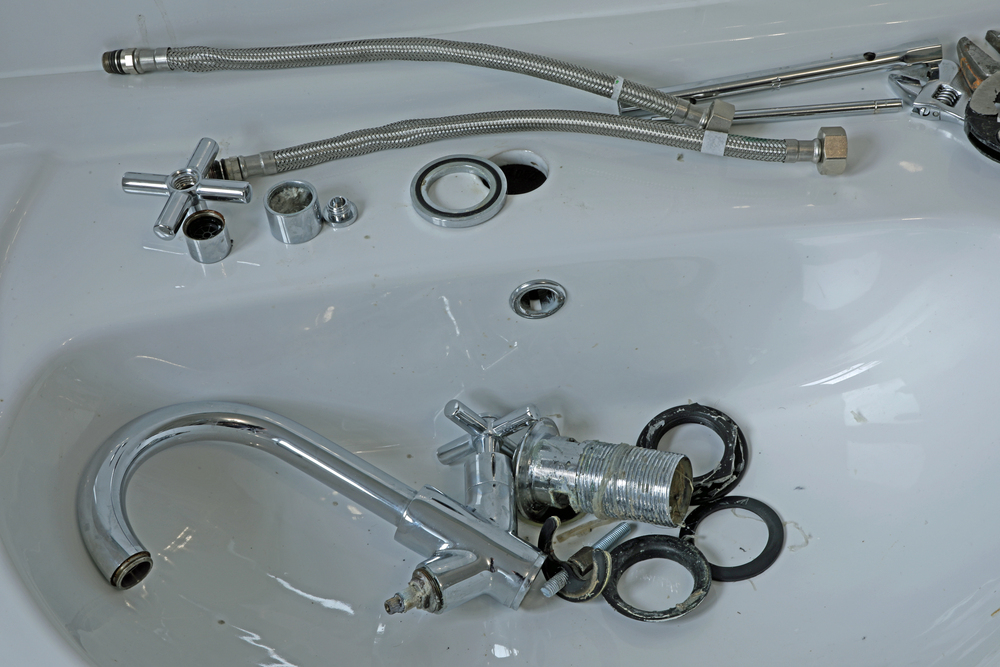
Next, it’s time to remove the old faucet. Depending on its age and installation style, this can vary in difficulty.
Start by disconnecting the water supply lines. Using your adjustable wrench, unscrew the nuts connecting the lines to the faucet.
Remember to have your bucket or towel handy to catch any residual water.
Once the supply lines are disconnected, locate the mounting nuts that secure the faucet to the sink.
Typically, these are found underneath the sink. Use a basin wrench to loosen and remove them. After that, lift the old faucet out of its position.
Clean the sink surface to remove any old sealant or debris.
Preparing the New Faucet
Preparation is key for a smooth installation. Before placing the new faucet, read the manufacturer’s instructions thoroughly. Each model may have specific requirements. Lay out all the components to ensure you understand how they fit together.
If the new faucet comes with a gasket or seal, ensure it’s in place. Some models might require silicone sealant; refer to the instructions for guidance.
Taking these steps now can prevent leaks and complications down the line.
Installing the New Faucet
With everything prepared, it’s time to install the new faucet. Begin by placing it into the sink’s mounting holes.
Align it properly, checking that the handles are positioned correctly for ease of use.
Once it’s in place, secure the faucet using the mounting nuts provided. Tighten them gently with your hands, and finish up with a wrench for a snug fit.
Avoid overtightening, as this could damage the sink or the faucet itself.
Connecting the Water Supply Lines
After securing the faucet, it’s time to reconnect the water supply lines. Take your water supply hoses and attach them to the appropriate faucet outlets.
Generally, the hot water hose connects to the left side and the cold to the right. Use plumber’s tape on the threads for a better seal.
Tighten the connections gently with your wrench. While it’s critical to ensure they’re secure, over-tightening can lead to damage or leaks.
Once everything is in place, it’s time to turn the water supply back on.
Testing for Leaks
With the water supply restored, turn on the new faucet to check for leaks. Allow the water to run for a moment while you closely inspect the connections and the faucet base.
If you notice any drips or leaks, turn off the water and tighten the connections or apply more plumber’s tape as needed.
It’s always a good practice to monitor the installation for a few hours after completing your project. Sometimes, leaks may not appear right away.
Finalizing the Installation
Once you’re certain there are no leaks, you can clean up your workspace. Remove any tools and put everything back in place.
If your new faucet has a sprayer, make sure it functions correctly, and check any additional features.
You might want to run hot water through the faucet for a bit to clear out any air bubbles in the lines. This ensures optimal water flow and performance.
Troubleshooting Common Issues
Even with careful installation, issues can sometimes crop up. A common problem is low water pressure, which may stem from a clogged aerator or improper installation.
If water trickles out instead of flowing freely, unscrew the aerator at the end of the faucet and clean it thoroughly.
If leaks persist, double-check all connections. It might be necessary to disassemble the faucet and reapply plumber’s tape or gasket seals.
Keeping an eye on the situation can save time and hassle later.
For persistent issues, a cincinnati plumber can help identify and resolve underlying plumbing problems.
Maintenance Tips for Your Faucet
Once your faucet is installed, a bit of routine maintenance can help extend its life. Regularly check for leaks and ensure all connections remain tight.
Cleaning the aerator periodically can prevent clogs and maintain good water flow.
If you notice mineral buildup, a solution of vinegar and water can help remove it. Soak the aerator in the solution, rinse, and reattach.
This small step can improve both the performance and appearance of your faucet.